
Carbine Setup by Joel Park
Posted by Joel Park on Jan 14th 2024
Carbine Setup
The majority of gun owners love talking about modifying their firearms. The internet is full of videos and articles about favorite loadouts and guns set up for the apocalypse. I am no exception, there was a period where I made a change of some kind to my rifles almost monthly as I was learning what worked for me and what didn’t. I am going to offer my two cents on things I think are important and the lessons I’ve learned along the way.
The first thing to get out of the way is, mission dictates gear. The setup and accessories choices will greatly vary from a duty style rifle, to a rifle designed to compete in UML matches. The distance you plan to shoot and the application will help determine the choices made.
Optics
People get very emotional about the red dot vs. low power variable optic (LPVO) discussion.
If you are shooting from very close range out to 100 yards, red dot optics are preferred. There isn’t a reason to use an LPVO when shooting man sized targets inside of 50 yards.
LPVO’s have issues with reticle and eye relief/tube construction. Scope reticles are either first or second focal plane. First focal plane reticles change size to become larger as you increase the magnification and second focal plane reticles stay the same regardless of max or low magnification. This in itself creates several headaches.
First, focal plane reticles changing with the magnification means your drop/holdovers will be the same regardless of which power setting you are on, which can be extremely helpful. The downside is the reticle is typically not very impressive for fast shooting on 1x or the lower magnification settings, but becomes very good on the higher magnifications. Second focal plane reticles never change. If you create a chart for your holds, it will only be accurate on the specific magnification your chart is for, so the versatility isn’t as good. The good side is the reticles are typically far more useful on 1x and the lower magnification settings and are much better suited for fast aggressive shooting.
n a perfect world, all rifle shooting would be done while target focused and that is very difficult to do with an LPVO. Most shooter’s eyes are drawn to the reticle regardless of magnification setting and they stare at the reticle while trying to move it to the target. This can also turn shooters into perfectionists that over aim; while continually refining the sight picture past what is acceptable to make hits on the target.
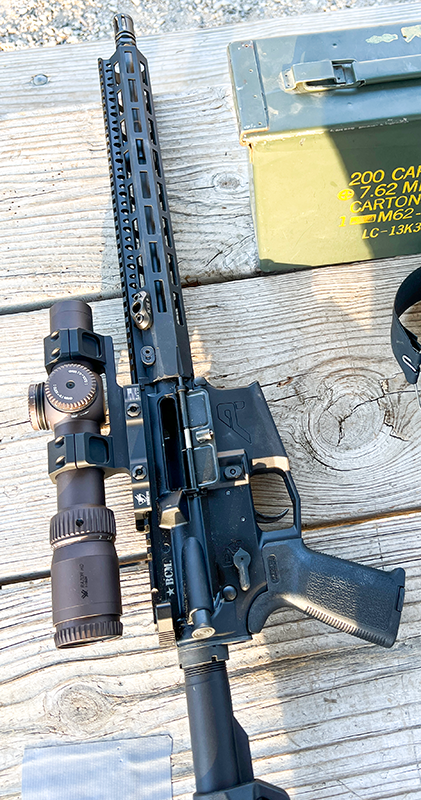
Scopes are without question superior for long range and shooting smaller or partial targets at distance. The Vortex Razor 1-6x24 or the EOTech Vudo 1-8x24 are my go to choices for LPVO’s. They both feature second focal plane reticles and can be made to do it all, if shooting at distance is needed.
I primarily use rifles that have red dots on them. I’ve used use EOTech and Holosun red dot optics that feature a 68/65 MOA ring and a small center dot. The reticle allows for several aiming schemes and is very easy to remember. The large 68/65 MOA ring can be used for fast close-range shooting or just centering the circle on the target. The large ring can also be used as a way for you to locate the center dot faster due to the proximity. The small center dot provides a very precise aiming scheme when shooting at small targets or longer distances. The ring also has a hash mark at the bottom which is the offset for 7-yards and is extremely useful for precise shooting at close distances. The Holosun 510C allows the reticle to be changed if you prefer to remove the 65 MOA ring and just have a dot.
The only negatives I have experienced with red dots are they can be tougher to shoot at longer ranges due to lack of magnification and can run out of battery power quickly. Storing an extra set of batteries in the pistol grip or stock of your rifle is helpful.
Zero and Optic Height
I use a 50/200 zero, but whatever zero you prefer is fine. Be aware that different barrel lengths will produce different velocities, so a 50/200 might work with a 16” barrel, but will be much different with a 10.5” barrel. More important than the zero you choose, it’s important to understand how height over bore affects where your bullets will go. The closer you get your optic to the barrel, the less variance there will be. Some equipment such as night vision encourages the use of optics risers. Regardless of what setup you choose, be aware of where the bullets hit at different ranges. This is just important in close range shooting as it is shooting at distance.
CoWitnessing Sights
Some shooters prefer the use of backup iron sights to accompany their red dot. The term cowitnessing means you can align and use your iron sights through the window of the red dot. Red dots like the EOTech XPS-2 is designed to cowitness with standard flip up rifle sights which places the red dot exactly where the front sight will be. The EOTech EXPS-2 features a lower third cowitness with most iron sights meaning the optic is just a little taller and you will see the iron sights aligned in the lower third of the window and the red dot will be above it.
Muzzle Device
The muzzle device has a large effect over how loud the rifle is and how much it recoils. Intended application will dictate your decision. Compensators reduce recoil at the cost of a lot more muzzle blast and gas pushed to both sides of the shooter. They can be very unpleasant for someone standing next to you as you shoot, but can be very beneficial for some shooting sports. Suppressors add weight to the end of the gun and can make it more awkward to move around, but they have obvious sound reduction benefits. If you plan to use a suppressor, you should make sure you pick a matching muzzle device for mounting.
I have found that basic A2 flash hiders give excellent performance when paired with solid fundamentals and a good grip. They are also very pleasant to use due to lack of noise and blast compared to ported muzzle devices. Intended application is very important to consider when researching muzzle devices. If your rifle is already equipped with an A2, I recommend training with it for a bit to verify the need for something else exists.
Trigger
Someone on the internet will chime in with a “my trigger finger is my safety” quote, but the reality is a mil-spec or 2 stage triggers can be shot just as well as a single stage trigger with some safety benefits. Be cautious of any trigger that uses a reduced power hammer spring since it can lead to reliability issues with some ammo types.
I prefer using either an enhanced mil-spec trigger, or a 2-stage trigger. A 2-stage trigger is basically what it sounds like. The first stage has slack or take up like a Glock trigger has. The second stage starts at the wall and typically has a crisp break. For resetting the trigger, it only needs to move past the break at the second stage before it can be pulled back to the wall for follow up shots.
Anything in the Geissele/ALG Defense lineup is easy to recommend due to track record and our experiences. If you are on a budget, the ALG Defense - Advanced Combat Trigger is my go to. It offers a much smoother and predictable trigger over the factory standard mil-spec trigger that comes in most rifles. If budget allows, the Geissele SSA-E is my go to. The SSA-E is a 2-stage trigger that offers a safety net of a heavier first stage pull before you get to a light break on the second stage.
Other triggers I like are the Geissele Super 3 Gun trigger, Super Dynamic Super 3 Gun trigger, SSA and ALG Defense Quality Mil-Spec Trigger. Lastly, you can get a lot accomplished with a basic mil-spec trigger. If that’s what you have, do not feel like it’s a limiting factor for improvement.
Sling
A sling is basically a holster for your rifle and is considered an essential piece of gear. I use 2-point slings and there are lots of good options available. The features I look for are ease of use and adjustment with minimal clutter or unwanted things to get in the way. I prefer the Edgar Sherman ESD Sling or the T. Rex Arms Sling due to ease of use and adjustment options.
There are a lot of options for sling mounting on most rifles. I use QD mounts and suggest you try different options to see what works best for you. The most popular configurations are using a mounting point just forward of the receiver attached to the forearm paired with either the end of the buttstock or a mounting plate behind the receiver just under the castle nut.
There are a few things to evaluate when testing different sling setups and supporting gear comes into play as well. With your regular rig/kit on, make sure you can do all the different loading, unloading and gun handling things you might want to do. Make sure you can lock the bolt to the rear even if you don’t plan to need to. If you are training with a handgun, make sure your sling allows you to move the rifle out of the way enough to access a full grip on your handgun.
Accessories
Other accessories I like are Magpul B.A.D. levers which allow you to manipulate the bolt catch without removing your firing hand from the grip. They greatly speed up bolt lock reloads and allow you to lock the bolt open with your firing hand very easily. I would consider them almost essential for any right-handed shooter that regularly trains.
Enhanced
charging handles just make life easier for manipulations and add much more
surface area to grab for clearing stoppages. There are a variety of really good
options that boil down to personal preference. I like Radian Arms and Geissele
charging handles.
Weapon mounted flashlights are a necessity for most work/duty style rifles. There are a lot of companies making quality lights and a plethora of mounting solutions and activation options. I’m not an expert with any tactic that involves using a light, but I have two key things we think are worth mentioning. First, make sure the activation is something you can do intuitively from your normal shooting grip. Something you need to search for or compromise your grip for will not do the trick. Secondly, move the light towards the muzzle/suppressor to minimize/eliminate the shadow your muzzle creates. Several companies create products for moving lights towards the muzzle such as T.Rex Arms, Arisaka and Haley Strategic. Some lights such as the Surefire Scout Pro feature a low-profile mount that has a hinge attached that allows the light to be moved very close to the rifle making for a very compact package.
Lefty Setup
A few bolt-on parts can make a stock carbine much friendlier for a left-handed shooter. Being left-handed, I use an ambidextrous safety and charging handle at a bare minimum. I prefer the Geissele Super Configurable Safety Selector. With this you can decide which length you would like the short or long safety paddle on. I set mine with the short side on the left side of the receiver so it’s not rubbing on my trigger finger while shooting.
Other products that have proven to be very helpful are Troy Industries ambidextrous magazine release and Geissele Maritime Bolt Catch. The Troy Industries release allows releasing the magazine with my trigger finger so it’s possible to reload the rifle just as fast as a right-handed shooter. The Maritime Bolt Catch extends the bolt catch towards the grip and allows the bolt to be locked open and released with the trigger finger. It’s not quite as easy as using a Magpul B.A.D. Lever, but it makes the rifle very usable for fast gun handling.
In the end, the rifle must fit you and feel comfortable. As your shooting ability improves, you will likely make subtle improvements and changes to your rifle over time.