What are the best belt, holster, and mag pouches for USPSA Single Stack?
Posted by Ben Stoeger Pro Shop on Apr 5th 2017
What’s on your belt?
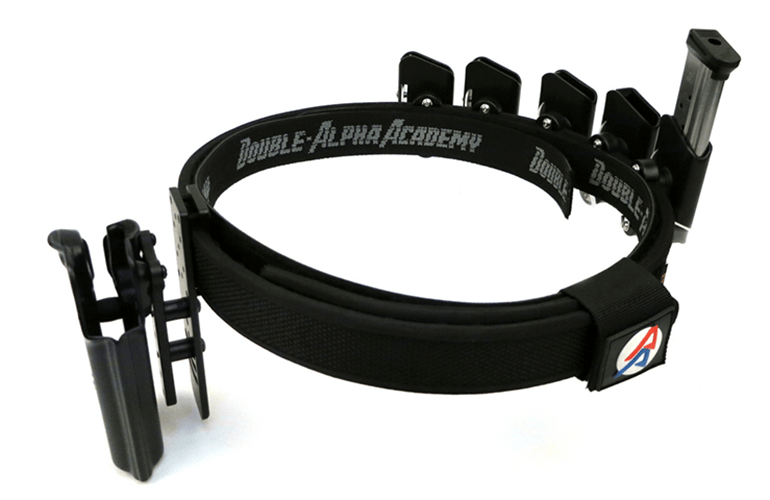
The first part of that question is determining what belt you would like to use. There are several good options. My favorite to date is Double Alpha’s offering. The main reason I like this belt is that it is the most rigid belt I have found for a reasonable price. This becomes important when you are going for an aggressive draw or mag change, it is vital that the gun/mag does not move. The Double Alpha accomplishes this the best for me. I would also advise ordering a belt that is a couple of inches larger than your normal belt. In the early morning or cold matches you may want to be able to tuck in extra clothing, and it helps to have a small amount of room to play with.

Mag Pouches:
The next question is what mag pouches to use and how many do you need? I have settled on the Double Alpha Racer pouches. These pouches have been a great option for me, specifically because they allow you the flexibility to utilize either the bullet nose forward or bullet nose out configuration. My preference is to actually use both set ups. My first three pouches are set with the bullet nose out. I like this set up because my weak hand can come straight off the gun the to mag pouch and then straight to the magwell. Running bullet nose forward you have to twist your wrist to get to the pouch, and then rotate the magazine to be lined up with the gun. My back three pouches are set up with the bullet nose forward. I came up with this solution because by the time I reach around to my fourth and fifth pouches my hand position is virtually the same using the bullet nose forward as it was using the bullet nose out on the first three problems. #skinnyguyproblems I don’t find that either set up is really faster than the other. The beauty of the Double Alpha pouches is that you can experiment and find the setup you like, without having to buy two sets of pouches. I also like these pouches because you can adjust how much tension is on the magazine. Sometimes a stage designer will present you with a long run or a situation where your magazine might fall out of a loose pouch. The Double Alpha pouches make it very easy to adjust the tension on your magazine.
Modifications:
I have made a couple of changes to my mag pouches from the way they come from the factory. The first was to drill a hole in the front of the pouch that lines up with the screw that mounts the pouch to the bracket. This is not necessary; however, if you might want to make adjustments to your set up, this hole will make that process much easier and faster. The next modification that I found necessary was to cut the top of the actual pouch off. As the pouch comes it covers quite a bit of the magazine. I found myself grabbing the pouch more often than the magazine. A little time with a hacksaw and a Dremel, and the problem was fixed. One last adjustment I found necessary was to use JB weld to lock the pouch into the mounting bracket. If you don’t dryfire much, this may not be a big issue for you. If you train hard you may find that the pouches can loosen up. The best solution is to find the position you prefer most and permanently attach them.
Holster/hanger:
 I use the
BOSS set up. For me it is simply the most rugged and consistent setup I have found. The hanger can be utilized to accept virtually any holster you prefer. The BOSS setup does a couple of things really well. First, it holds the gun away from the body (within the legal limits). The BOSS also keeps the space between the gun and the belt clear. This is important when you draw the gun you don’t want anything in the way of your thumb being able to acquire the exact position that you want on the gun, before you draw the gun.
I use the
BOSS set up. For me it is simply the most rugged and consistent setup I have found. The hanger can be utilized to accept virtually any holster you prefer. The BOSS setup does a couple of things really well. First, it holds the gun away from the body (within the legal limits). The BOSS also keeps the space between the gun and the belt clear. This is important when you draw the gun you don’t want anything in the way of your thumb being able to acquire the exact position that you want on the gun, before you draw the gun.
The BOSS set up is also very easy to adjust in order to position it right where you prefer for fast, consistent draws. It’s easy to move up or down to match your height preference or comply with division requirements. It also has a wide range of tilt. Once you have found the position you like, simply tighten the screws down. I have not had to re-tighten any of the screws even after multiple seasons of abuse. BSPS also includes an adjustment knob with every BOSS rig. This makes it extremely easy to add or reduce the tension that the holster has on the gun. This can be very handy if a stage requires you to make a run before you can draw the gun. You can easily tighten the gun down and avoid having it bounce out of the holster.
Timer:
I really like the CED timer. The ability to look at your previous run times and splits really comes in handy. The CED timer is fairly intuitive to use. Reviewing times, setting par times, adjusting the sensitivity, and other options are all easy to access. The other advantage of the CED timer is the size and weight. It is relatively lightweight, and quite a bit smaller than many other available offerings. There are a couple of drawbacks to the CED. The screen can be difficult to read in some lighting conditions with polarized lenses. The CED timer is also not overly robust. However there is a silicone case and belt clip available. With these two small accessories the CED timer can survive quite a bit more abuse, as well as keep the timer handy for practice.
Keeper:
The Arrendondo keeper has been the most convenient keeper for me. It stays on the belt all the time, so I don’t have to keep track of it. You simply put the belt on and slide the keeper over the end of the belt. This keeps the belt from opening up. If your Velcro is worn you may want a belt keeper that goes over the inner belt and outer belt.
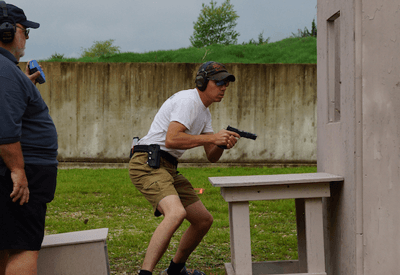
Green shirt photos by Jordan Ohlmann Photography
Jeremy Reid
USPSA Grand Master
2017 US World Shoot Team Member
http://www.reidpistolsmithing.com/
Reid Pistolsmithing Facebook
Reid Pistolsmithing Instagram